
I have a confession to make. Actually I may have made this confession before, but it bears repeating. I. Love. Gadgets. I love any gadget that will help me do things better, faster, more efficiently. This explains why my kitchen looks like a Bed, Bath & Beyond blew up in there, but I can’t take full credit for that, since Chris loves to cook, too. Anyway, suffice it to say that I am always on the look out for something to help me do things better. And when it comes to quilting, I think I have found two “gadgets” that I personally find to be worth the cost of admission.
Today’s focus is on cutting machines. I’ve had a Brother Scan N Cut (SNC) since they first came out, but to be perfectly honest, I’ve never been all that impressed with it because I have yet to fully figure out how to use Brother’s Canvas program. To me, it’s unnecessarily difficult, but it could be that I just haven’t put enough time to in understanding how it works. I will say that not having to be connected to the Internet is a big draw, as is the ability to scan in your fabric and fussy cut pieces. It would also be misleading if I didn’t mention another pet peeve when it comes to the SNC, and that is the difficulty in buying accessories for it. From blades to mats to “fun” things like the rhinestone add on, it’s far more difficult to buy accessories than it should be. I can order from Amazon, or I can go to my local quilt shop to buy things (and trust me when I say their accessory choices are pretty scant), but I can’t walk in to a Michael’s or Joann’s and buy anything for the SNC.
A couple of years ago at Christmas, my darling husband and children purchased a Cricut Air Explore 2 for me. I really like the Air Explore 2 because it was a bit more intuitive for me to use, and it works quite well. My only complaint, if it can be called that, is that you have to jump through a couple of hoops to get it to cut fabric. It’s not difficult, but you really need a stabilizer on the fabric in the form of interfacing to get good cuts. Otherwise, the machine just shreds the material, and it’s a real pain to clean up. My daughter, who received an Air Explore 2 the same year (courtesy of all of us, of course), upgraded to the Cricut Maker pretty quickly. I can’t lie, I was a little jealous. It had the promise of better fabric cutting and the ability to cut other materials that the Explore 2 couldn’t handle. When a friend of mine posted on Facebook earlier this year that she was looking for an Air Explore 2, I checked with my family to be sure they’d be ok with it, and then I sold her mine with the intention of using that money to upgrade to the Cricut Maker. It took me longer than I expected, but I finally pulled the trigger at the first of April.
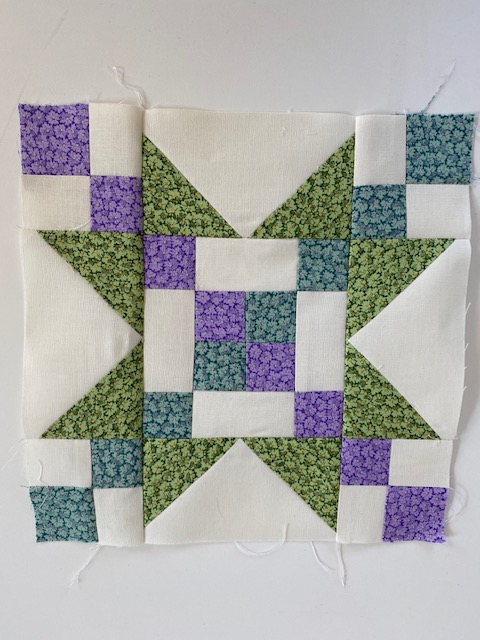
In the interest of full disclosure, I have to tell you that I also have an Accuquilt Go! cutting system, and I love it. I’ll write about it in a later post, but for now I will say that when it comes to standard shapes, I don’t believe you can do better than the Accuquilt Go! system. It really is the best thing I’ve found when it comes to cutting shapes in standard sizes. What I think it doesn’t do well is applique (I’ll explain in that later post) and odd sizes for standard shapes. It isn’t the fault of the Accuquilt system, but it is a limitation. For example, I designed the quilt I’m working on right now. It has two blocks – the standard nine patch, and what EQ 7 called a Frayed Sawtooth Star block. I designed the quilt to use 9″ blocks, and the frayed sawtooth star uses some fairly small pieces at that size – 1 5/8″ squares, for example. That’s not a standard size, obviously, so Accuquilt doesn’t have a die that size. But the one that really stumped me was the 5 11/16″ square. Unsure how to cut that with a ruler, and not realizing that in EQ 8 (I upgraded since I designed the pattern originally) I could choose 1/8″ or 1/16″ increments, I didn’t really know how to cut squares this size.
Lately, though, my biggest issue is that cutting is not my strong suit. I had to have shoulder surgery in 2009, and ever since then my cutting has been … errr … bad. Like 4 year old in Kindergarten bad. I realized a while back that I really need to find a way to handle my cutting needs better because it causes me some pain, and I’m just not able to hold the ruler steady no matter what I try. I’ve invested a fair amount of money in the Accuquilt Go! system and I love it, and you’ll be seeing a lot more posts from me in the future utilizing it. But my 5 11/16″ squares had me stumped. Add to that, I need to take those squares and cut them in to quarter triangles and I had to come up with some sort of solution. Enter the Cricut Maker.
I am NOT a whiz with the Maker, at all. I haven’t had much of a chance to use it, despite the lockdown, because I’m still working (from home). But this past weekend, I got on YouTube and figured out how to do what I needed to do, which was to cut a bunch of 5 11/16″ squares, and then slash them in to quarter square triangles. It was NOT difficult, but it took some finagling to get it right. Essentially, I had to decide how many squares I could cut in 11.5″ inches (because the Maker needs a bit of a margin, apparently). Obviously, for this particular square, I couldn’t get more than 2 across, and 2 down, unless I use the 12″ x 24″ mat, in which case I can do 4 down, making my square a rectangle of 11.5″ x 23″. Then I had to add cutting lines at the appropriate intervals for the squares, then cutting lines for the quarter square triangles from the squares. The first time I did this, I didn’t realize that I hadn’t attached everything together, so the Maker was cutting all sorts of weird lines in seemingly random places, but once I realized my mistake and fixed it, it worked beautifully. The Maker cut 20 quarter square triangles perfectly in less than a minute, I think it was. Certainly faster than I could have done it. Granted, it took me some time to set it all up, but once I understood how to do it, it was pretty fast. Then I did the same with the 3 1/8″ half square triangles and again for the 1 5/8″ squares, just to cut them faster. I need about a billion of them in three different colors, so this really was the fastest way to get them all.
I have to say that the Maker exceeded my expectations and did a fabulous job of cutting the pieces for this quilt. I didn’t cut all the pieces, because I wanted to try it out, but I will say the Maker did a great job of cutting enough pieces for more than four blocks in a very short period of time. One thing I’ve noticed is that the pieces cut with the Maker, while accurate, tend to have a problem with fraying, so I think that when I do this in the future, I will only cut for a few blocks at a time to reduce the time they have to unravel. Now that I have those sizes set up, though, I can have a set of blocks cut in less than 10 minutes. Overall, I think it’s a great way to cut pieces for a quilt, particularly if you have issues with cutting, or need fussy sizes like 5 11/16″. Would I recommend it over the Accuquilt for standard sizes? No, I don’t think so. But if you already have a Maker, and you don’t have an Accuquilt, I would say go for it and try it. I would start with something that isn’t for a project, but other than that, I think the Maker is a great fabric cutter.

[…] working on my Little House on the Prairie quilt. You can read about my use of the Cricut Maker here, if you missed it. Admittedly, I haven’t gotten tons done since that post. I’m a slow […]
[…] was a bit limiting, and I wanted a Maker so that I could cut fabric as well as vinyl. I bought a Cricut Maker back in April and started using it almost immediately for cutting fabric. But by the time I got ready to buy a […]