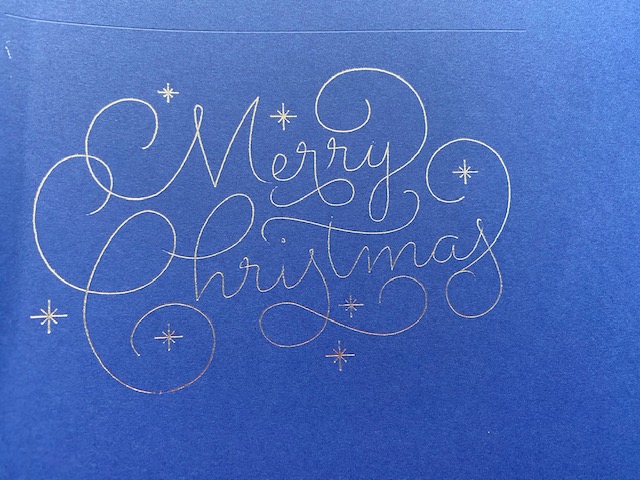
This year was a Cricut Christmas, to be sure, and I have to say I enjoyed using the Cricut a lot more than I anticipated! I made a few t-shirts, some gift tags, and some Christmas cards, all using different materials, and I have to say it was a lot of fun experimenting with different media. One of my favorite things to use this year was the Cricut Transfer Foil.
In order to use the transfer foil, you need the tool. Fortunately, the tool comes with three tips (fine, medium and bold) and several small sheets of foil in gold and silver. There are also larger sheets in those colors for larger projects, and sheets in red, blue, green and purple. I haven’t seen the red available anywhere but online in the Cricut store, At first, I thought the product was difficult to use and a bit fussy, but I admit that I didn’t notice the instructions before jumping in. I ruined a couple of sheets of foil trying to figure out how to use it, along with taking the time to peruse a few YouTube videos, before I was able to master the use of the foil tool and transfer sheets. I have to give a huge shout out to Jennifermaker.com’s video on Cricut Foil. Without it, I might have never figured out how to use this stuff. But in the end, I think the time and effort is totally worth the effect you get by using the transfer foil in projects.
There are a few things to be aware of when using the foil. First of all, you want to be sure your pressure is set correctly. Sometimes, “Default” isn’t the right setting. Secondly, pay careful attention to where the foil is placed on the project before you get started, because it can be difficult to figure out once you’ve already started. Third, be sure you don’t do like me and accidentally hit the “Unload” button between the time your card is foiled and when it cuts. And finally, this stuff is completely addicting, because the results are so great. Fortunately, the “sampler packs,” which are perfect for making cards, are not expensive, and you get several sheets of foil in each one.
When using the foil, make sure your setting is for a slow cut, otherwise you could tear up the foil, mid-cut. Also, the package comes with a lot of tape to attach the foil to the base material. USE THE TAPE GENEROUSLY. I had one piece of foil get messed up because I was chintzy with the tape, and I shouldn’t have been.
Making cards might be one of my new favorite things to do with my Cricut now. Not only did I make the foil cards, I also did some cut cards as well. Sadly, I didn’t get any photos of those, but I will work on making some more and get pictures of them. But now that Christmas is over, I am going to start working on some Valentine’s, St Patrick’s and Easter cards to send out this coming year. Even as they keep saying things will be returning to a more normal situation by Spring, I suspect we will still be somewhat isolated. Also, my mom lives across town from me, and I bet some unexpected cards will be a nice surprise for her.
If you haven’t purchased a Cricut foil tool, I would highly suggest getting one when they are on sale. I purchased mine when I had $20 in Michael’s rewards, which significantly reduced the price, but you can’t use coupons on Cricut items. Is it worth paying full price? Well, yes, if you have a specific use in mind for it, it could be worth the full price. I purchased mine in the Fall, before I had any real plans to use it. I saw it, I wanted it, I ordered it. Because yeah, back then, you couldn’t get the tools in store, but I think you can now.
If you have a Cricut foil tool and have yet to try it out, what are you waiting for?!? This thing is pure gold!
Disclaimer: I do not receive money or products for my opinions. These are my true impressions, without any affiliation with any other entity. I purchased all products reviewed, and did not receive any product from a company. 🙂
